How To Guide: Raspberry Jam Method
Hi there! In this guide, I will walk you through the step-by-step process of making delicious raspberry jam. Get ready to experience the joy of preserving the bright flavors of fresh raspberries in a jar! Let's get started.
Ingredients:
- 2 pounds of fresh raspberries
- 4 cups of granulated sugar
- 1/4 cup of lemon juice
- 1 tablespoon of unsalted butter (optional)
Equipment:
- Large, heavy-bottomed pot
- Wooden spoon
- Jam thermometer
- Sterilized glass jars with lids
- Water bath canner or large stockpot
Step 1: Prepare the Raspberries
Begin by gently washing the raspberries under cool running water, being careful not to crush them. Allow them to drain in a colander for a few minutes.
Step 2: Mix the Ingredients
In a large, heavy-bottomed pot, combine the raspberries, sugar, and lemon juice. Give it a gentle stir to evenly distribute the ingredients.
Step 3: Cook the Jam
Place the pot on medium heat and bring the mixture to a boil, stirring constantly with a wooden spoon. Once the mixture reaches a rolling boil, reduce the heat to low and let it simmer for about 15-20 minutes. Skim off any foam that forms on the surface.
Step 4: Check the Jam's Consistency
To ensure your jam reaches the desired consistency, use a jam thermometer. The temperature should reach 220°F (105°C). This indicates that the jam has set.
Step 5: Add Butter (Optional)
If desired, you can add a tablespoon of unsalted butter during the last few minutes of cooking. This helps to reduce the foam and gives the jam a glossy appearance.
Step 6: Test for Doneness
Perform a quick gel test to check if the jam has reached the desired thickness. Place a small amount of the jam on a cold plate and let it cool for a minute. If it wrinkles when nudged with your finger, then it's ready. If not, continue cooking for a few more minutes and repeat the test.
Step 7: Prepare the Jars
While the jam is still hot, carefully ladle it into sterilized glass jars, leaving a 1/4-inch headspace at the top. Wipe the rims clean with a damp cloth, ensuring there are no traces of jam.
Step 8: Seal the Jars
Secure the lids on the jars, making sure they are tightly closed. For long-term storage, you can either refrigerate the jam or process the jars in a water bath canner. If using a canner, submerge the sealed jars in boiling water for about 10-15 minutes.
Step 9: Enjoy!
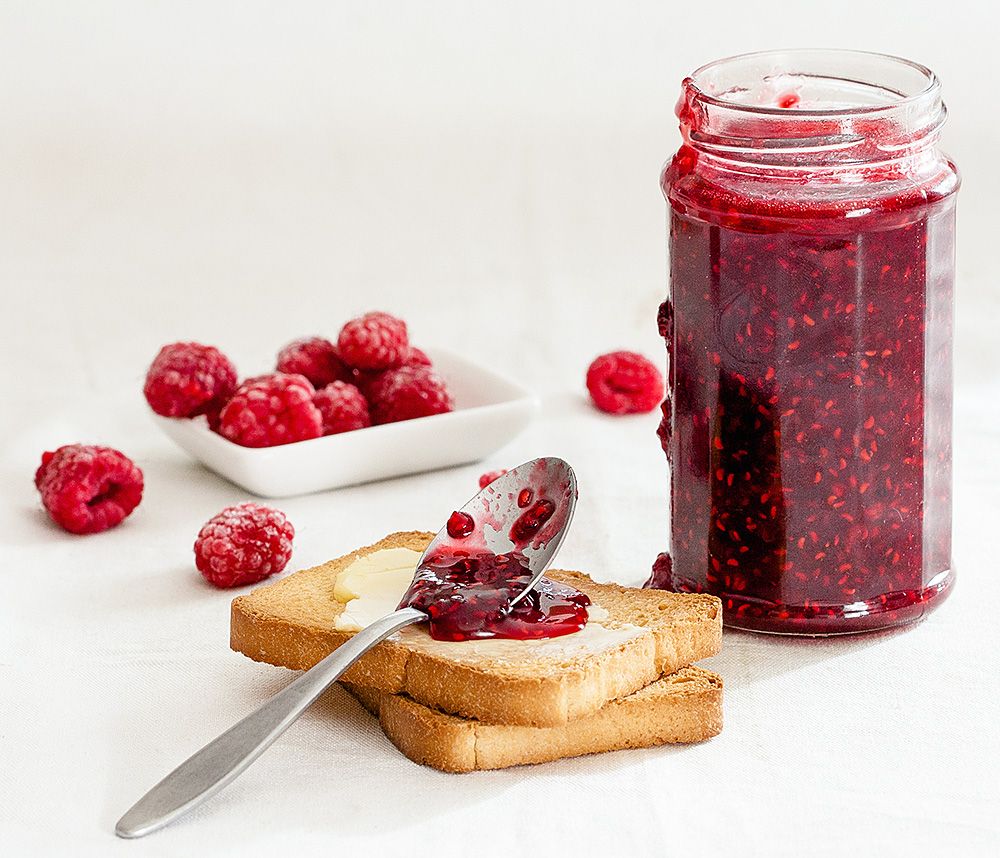
Allow the jars to cool completely before storing them in a cool, dark place. The jam can be enjoyed for up to a year, but it's likely to be devoured long before that! Spread it on toast, scones, or use it as a delicious filling in pastries and cakes.
There you have it, a simple and foolproof method for making scrumptious raspberry jam. Enjoy the fruits of your labor or share them as delightful homemade gifts with family and friends. Happy jam making!


 Admin
Admin 


